AdaSoft.Messaging is a system for sending and receiving emails
through SMTP, IMAP and POP3 protocols. It supports Windows 7 or newer,
Windows Server 2008R2 or newer, Linux 64-bit and Mac. A complete list of
all supported operating systems is available at
https://github.com/dotnet/core/blob/master/release-notes/2.0/2.0-supported-os.md.
-
Download the program backup AdaSoft.Messaging and unzip it in a
folder of your choice, for example С:\Programs\AdaSoft.Messaging -
Download and install .NET Core Runtime from
https://www.microsoft.com/net/download/Windows/run -
Set it up according to the configuration file
instructions -
Set up the program to initiate automatically. This can be achieved in
one of the following ways:
4.1. Windows Service
- Run install_service.bat as administrator (the Run as administrator
option) in the program's folder - A service named .... will be added in Windows Service
4.2. If you are unable to install Windows Service, you can set up the
program to run automatically by using the Task Scheduler.
Setting Up Messaging as Task in Task Scheduler
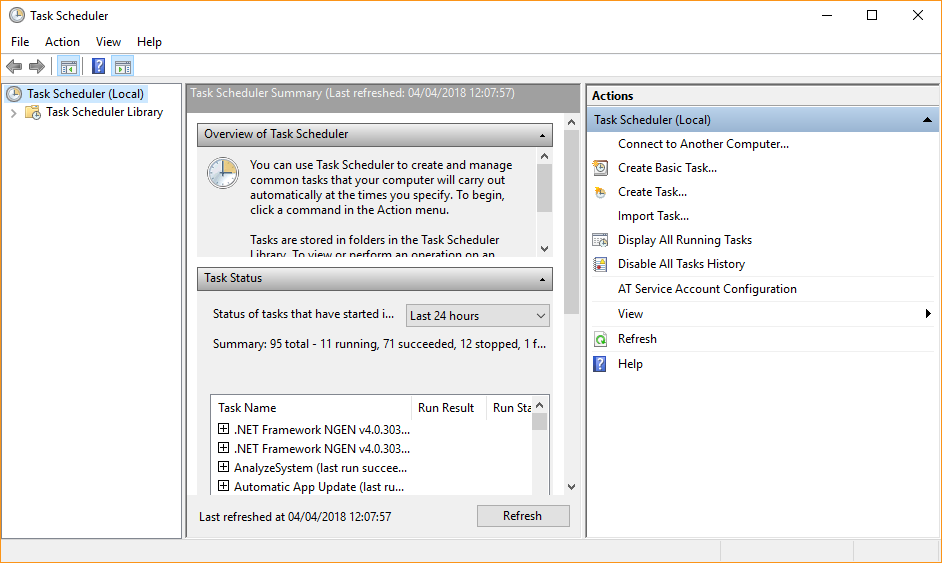
- Go to Control Panel in Windows, open Task Scheduler and
select the Create Task option.
Note
If View by is set to the Category option, click System and
Security → Administrative Tools → Open Task Scheduler. If it
is set to Large Icons, you can access Administrative Tools
directly and open Task Scheduler.
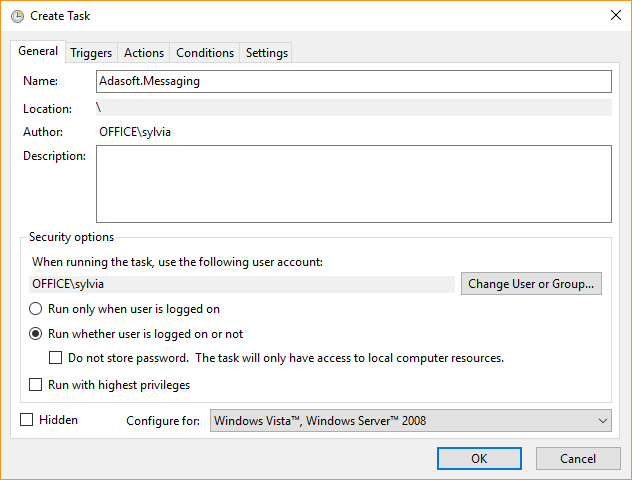
- Fill in the name of the task in the Name field. If you want you
can add a description in the Description field.
2.1. If you are logging in with your username, or somebody else's
username other than SYSTEM, check the Run whether user is logged
on or not option to run the program regardless of whether you are
logged in or not.
2.2. If you are logging in as SYSTEM, the options will be inactive
because SYSTEM is by default assumed constantly logged in. Click
OK.
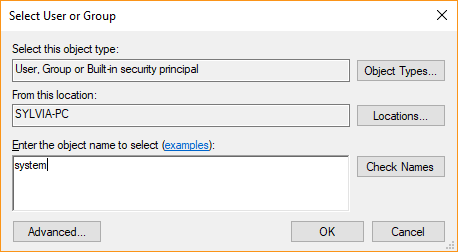
- To change the user, click Change User or Group. In the Enter
the object name to select field, enter the new username, for example
SYSTEM. Click OK.
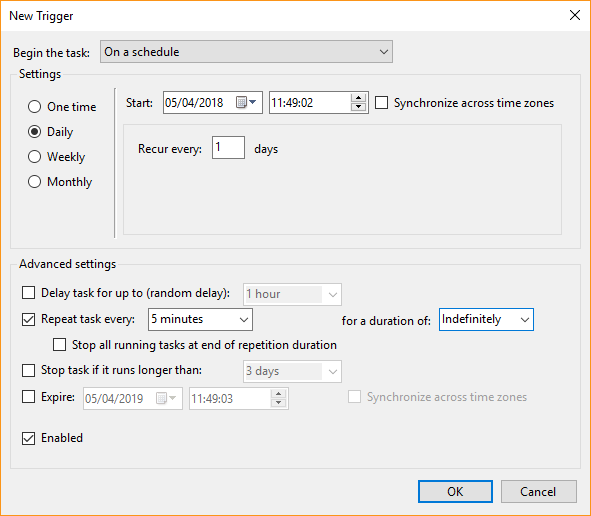
- Open the Triggers tab and click New. Enter the following
values in the fields:
- Begin the task → Select On a schedule from the drop-down
list - Settings → Daily
- Recur every → 1 (days)
- Repeat task every → Select 5 minutes from the drop-down list
- for a duration of → Indefinitely
Choose the task's start date and time, the interval at which it will
recur as well as whether to synchronise it across different time zones.
Check the Enabled box and click OK.
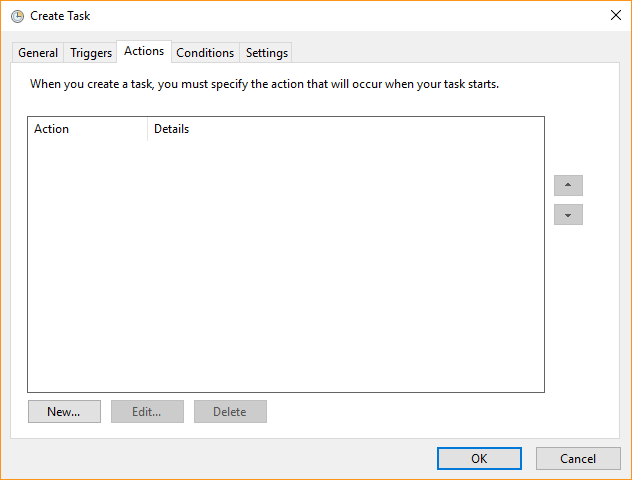
- Open the Actions tab and click New.
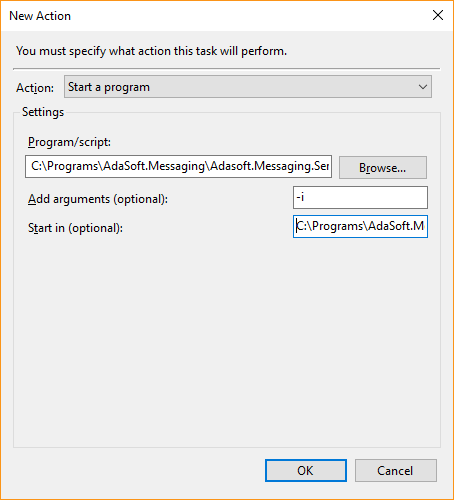
- In the Action field select the Start a program option from
the drop-down list and enter the following values:
- Program/script: click Browse and select the configuration
file
**С:\Programs\AdaSoft.Messaging\Adasoft.Messaging.Service.exe **from
the program folder - Add arguments (optional): -i (add the argument -i)
- Start in (optional): set the path to the project folder, in our
case C:\Program\AdaSoft.Messaging
Once you are ready, click OK.
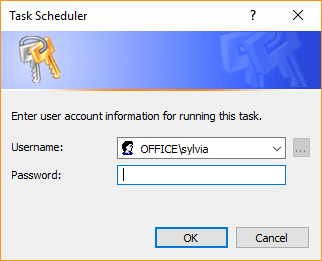
- Click the OK button in the Create Task window. If you are
logged in with a username other than SYSTEM, the program will prompt
you to enter the respective password.
If you are logged in as SYSTEM, the program will automatically
complete the new task creation and the task will appear in the Task
Name list of tasks.