¶ All timesheets [Timesheets-Alltimesheets]
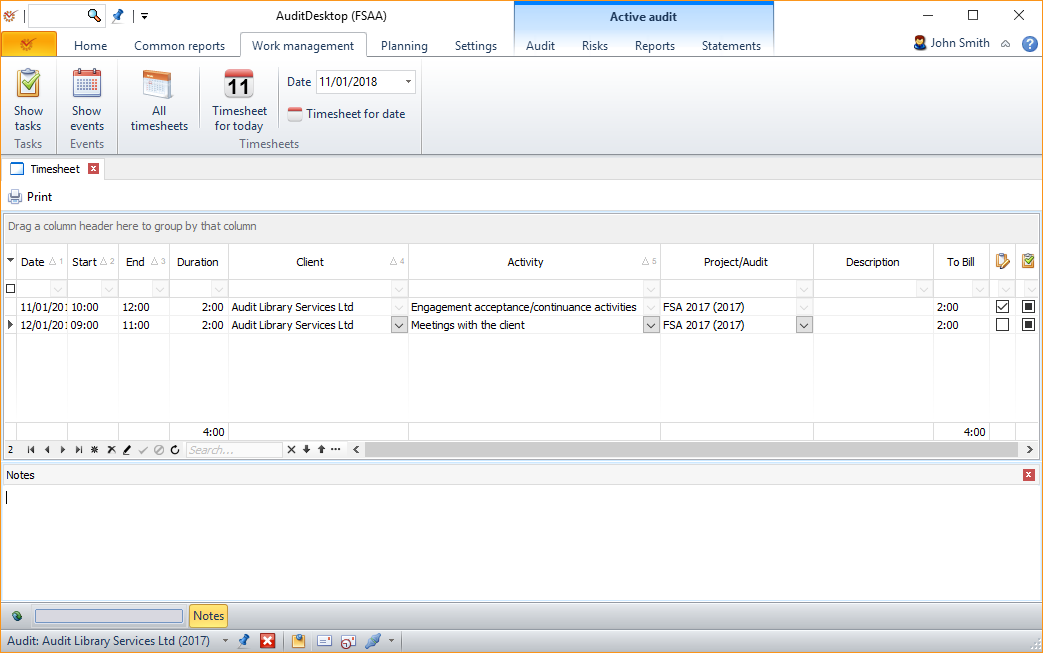
Open the Work management tab and click the All timesheets
button. The window will display all your timesheets, without limitation
as to date and client.

- Date - enter the date of the activity
- Start - enter the start time
- End - enter the end time
- Duration - the program automatically calculates the duration of
the activity - Client - select the desired client
- Activity - select the corresponding activity
- Project/Audit - select the engagement for which the activity was
done - Description - add a more detailed description of the activity
- To bill - automatically calculates the billable hours according
to the activity settings and time invested. You can
edit the value, if necessary.  To be
To be
invoiced - whether the client should be invoiced Invoiced -
whether the client has already been invoiced
You can enter individual activities either for a specific time range or
directly enter the total sum of working hours. You can add as many
activities as necessary in a single timesheet. Each separate row can be
entered for a different client and a different engagement.
The Notes field enables you to add notes to the timesheet you have
created.
Select one or several records (shown in the video below) and click
Print to open the window for template selection and
printing. The templates can be personalised and sent as
emails through the messaging module. If you don't select
any records, the program will print out all data.

¶ Timesheet for today [Timesheets-Timesheetfortoday]
The Timesheet for today button opens a window that will
automatically load records for the current date.
¶ Timesheet for date [Timesheets-Timesheetfordate]
If you set a date in the Date field and click Timesheet for
date, the program will load the screen for your selected date.
¶ Settings [Timesheets-Settings]
To personalise the settings of the columns, open the Application
menu, click Settings and select Timesheet: General.